> ## Documentation Index
> Fetch the complete documentation index at: https://docs.plato.ae/llms.txt
> Use this file to discover all available pages before exploring further.
# Add Fields
> Add fields to a CMS database and arrange them in a useful editor order.
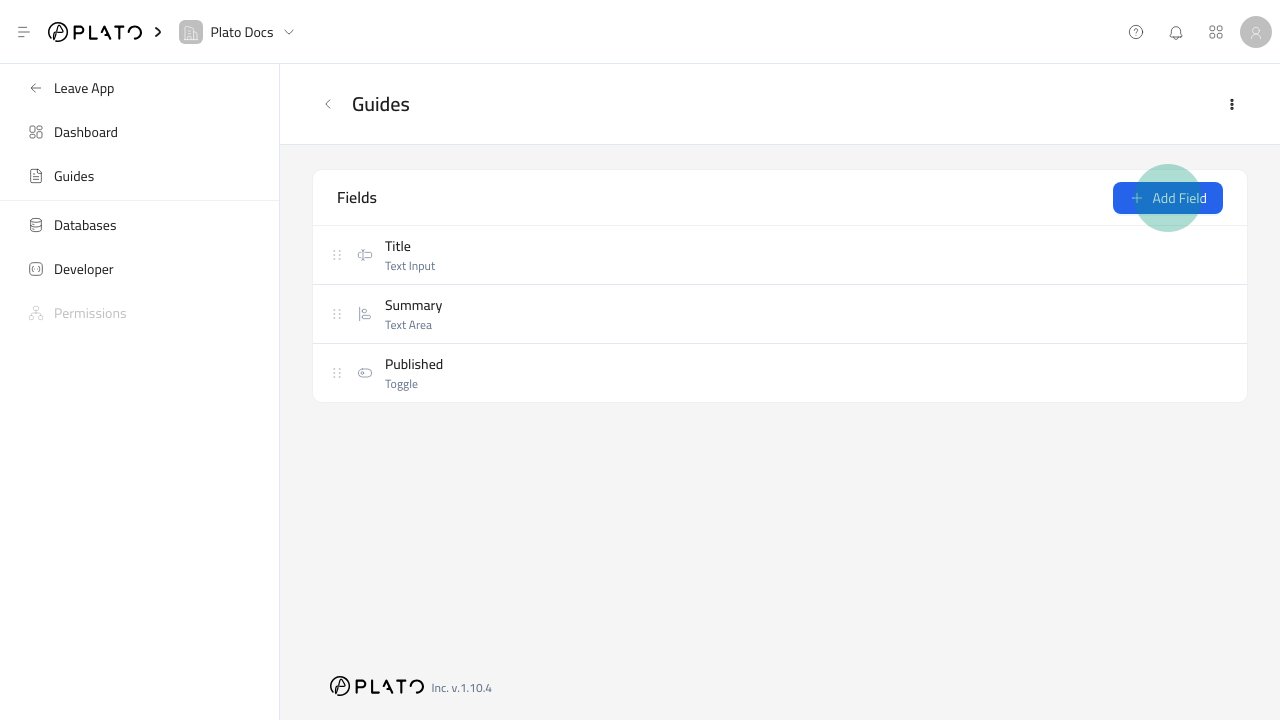
 Add fields after creating a database.
## Open The Schema Editor
1. Open `CMS`.
2. Go to `Databases`.
3. Open the row menu for the database.
4. Click `Edit Schema`.
5. Click `Add Field`.
## Choose The Field Type
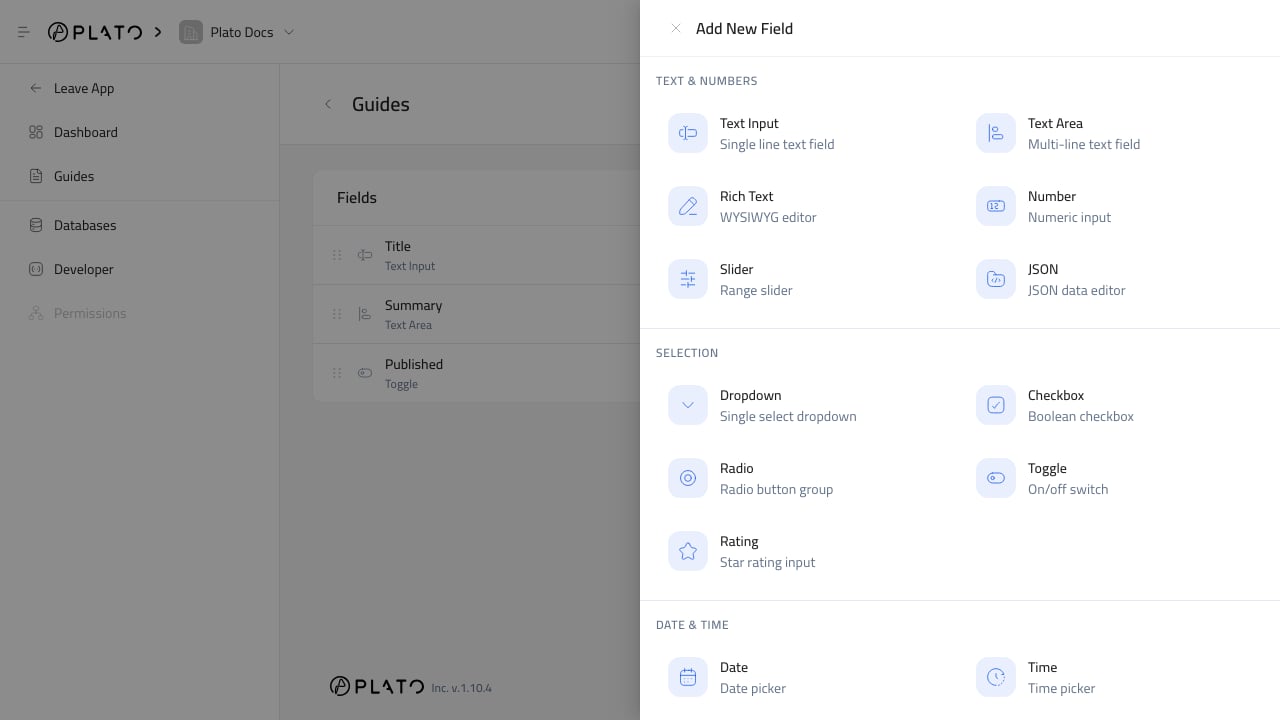
Choose the field type that best matches the content editors will enter.
Good examples:
* Use `Text Input` for names, slugs, URLs, emails, and short labels.
* Use `Text Area` or `Rich Text` for longer body content.
* Use `Image` for one or more images from Drive.
* Use `Dropdown`, `Radio`, or `Checkbox` when editors must choose from known options.
* Use `Date` or `Date & Time` for scheduled or time-based content.
* Use `Relation` fields when an entry should point to another CMS table or supported system table.
* Use `Map Point` for a saved location.
## Fill The Schema Tab
Add:
1. Field key.
2. Data type when editable.
3. Label.
4. Helper text when the field needs guidance.
5. Placeholder when it helps editors understand the expected value.
6. Default value when new entries should start with a value.
Turn on `Required` for values that must be filled before saving.
Turn on `Localization` when the field value should be entered per language.
## Configure The Field Tab
Use the field-specific settings to control input behavior.
For example, add select options for dropdowns, file limits for media fields, number limits for numeric fields, and a target table for relation fields.
## Arrange The Form
Use the `Interface` tab to group related fields.
For large tables, use tabs and sections. For compact tables, field widths and dividers may be enough.
## Save And Test
After creating fields, open the table entry list and click `Add Entry`.
Check that:
* Required fields are clear.
* Labels and helper text make sense.
* Localized fields show language tabs.
* Relation fields show useful option labels.
* The table list displays the columns staff need most.
Add fields after creating a database.
## Open The Schema Editor
1. Open `CMS`.
2. Go to `Databases`.
3. Open the row menu for the database.
4. Click `Edit Schema`.
5. Click `Add Field`.
## Choose The Field Type
Choose the field type that best matches the content editors will enter.
Good examples:
* Use `Text Input` for names, slugs, URLs, emails, and short labels.
* Use `Text Area` or `Rich Text` for longer body content.
* Use `Image` for one or more images from Drive.
* Use `Dropdown`, `Radio`, or `Checkbox` when editors must choose from known options.
* Use `Date` or `Date & Time` for scheduled or time-based content.
* Use `Relation` fields when an entry should point to another CMS table or supported system table.
* Use `Map Point` for a saved location.
## Fill The Schema Tab
Add:
1. Field key.
2. Data type when editable.
3. Label.
4. Helper text when the field needs guidance.
5. Placeholder when it helps editors understand the expected value.
6. Default value when new entries should start with a value.
Turn on `Required` for values that must be filled before saving.
Turn on `Localization` when the field value should be entered per language.
## Configure The Field Tab
Use the field-specific settings to control input behavior.
For example, add select options for dropdowns, file limits for media fields, number limits for numeric fields, and a target table for relation fields.
## Arrange The Form
Use the `Interface` tab to group related fields.
For large tables, use tabs and sections. For compact tables, field widths and dividers may be enough.
## Save And Test
After creating fields, open the table entry list and click `Add Entry`.
Check that:
* Required fields are clear.
* Labels and helper text make sense.
* Localized fields show language tabs.
* Relation fields show useful option labels.
* The table list displays the columns staff need most.